The Amelie Cape Sew-a-Long Day 3
Find the pattern HERE
Hurrah! It's the final day of the Sew-a-Long!
For Day 3 we will create the collar option - and attach the hood!
Sew Collar View C and D
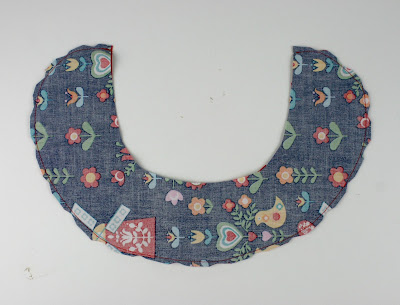
With right sides together pin the main collar to the lining collar pining along the front edge. Sew. Trim seam to 1⁄4 inch, turn and press.
Attaching the Collar View C and D
Open out the completed collar and pin the main collar fabric to the cape body along the neckline, matching edges and centres. Stitch and trim the seam allowance to 1⁄4 inch.
Fold the collar lining under (wrong sides together) 1⁄2 inch and press. Pin the lining to the main cape body along the neckline and use an invisible hand stitching to finish the cape.
Alternatively you can top stitch the neckline to finish off the cape. If you are using a slippery fabric it is also advisable to top stitch the hood and cape body all around 1/8 inch from the edge.
Attaching the Hood View A and B
Open out the completed cape hood and pin the main hood fabric to the cape body along the neckline,
matching edges and centres. Stitch and trim the seam allowance to 1⁄4 inch.
Fold the hood lining under (wrong sides together) 1⁄2 inch and press. Pin the lining to the main cape body
along the neckline and use an invisible hand stitching to finish the cape.
Alternatively you can top stitch the neckline to finish off the cape. If you are using a slippery fabric it is
also advisable to top stitch the hood and cape body 1/8 inch from the edge.
Try it a Different Way!
An alternate sewing method for piecing the cape together!
Use the instructions above to create your hood or collar first. Baste your straps / button loop in place on the main fabric. The spot to baste the straps or button loops is marked on the pattern with a star.
With right sides together sandwich your hood or collar in between the main and the lining fabric pinning along the neckline.
Sew all the way around the cape body leaving a 4 inch opening at the centre back hem. Trim the seam allowance, clip or notch curves and turn the cape the right side out. Press the cape all around and hand stitch the opening shut.
Optional - If you are using a slippery fabric or love the look you can top stitch the hood/collar and cape body all around 1/8 inch from the edge.
You’re all done!
Congratulations!


Comments
Post a Comment